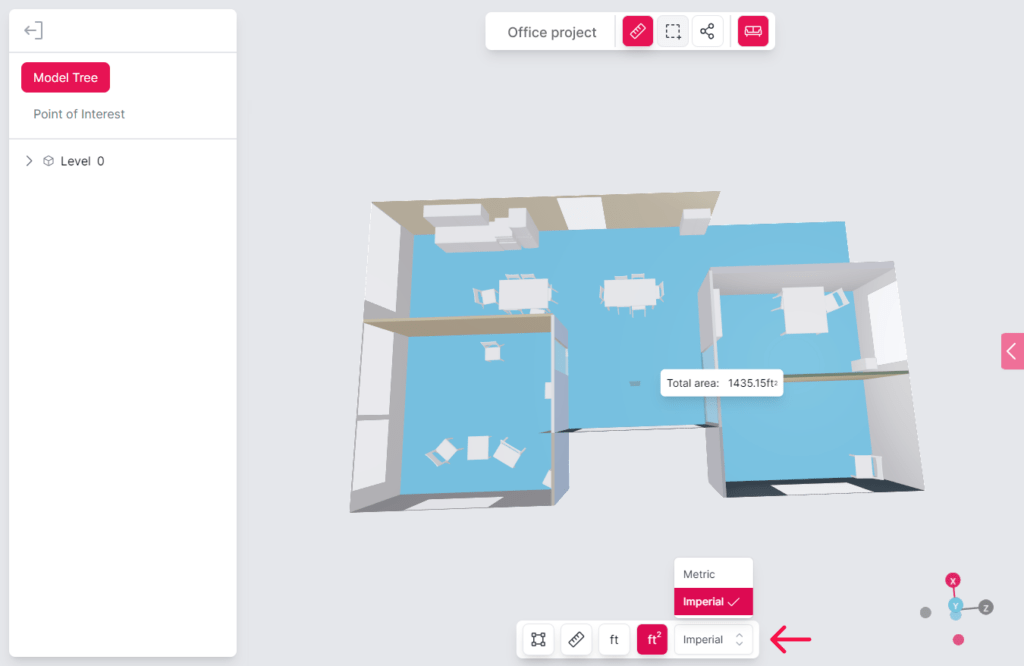
Understanding the dimensions of the objects within scanned 3D models is important for various project stages. Metaroom Workspace offers a basic measurement functionality to empower users to revisit their scanned 3D space and obtain measurements with the following options:
- Area Measurement Tool – use this feature to draw the area you want to measure manually. By simply snapping the room element’s boundaries, you can see the total area measurement of the selected space.
- Measuring Tape – you can manually measure point-to-point distances within the scanned space by selecting this feature.
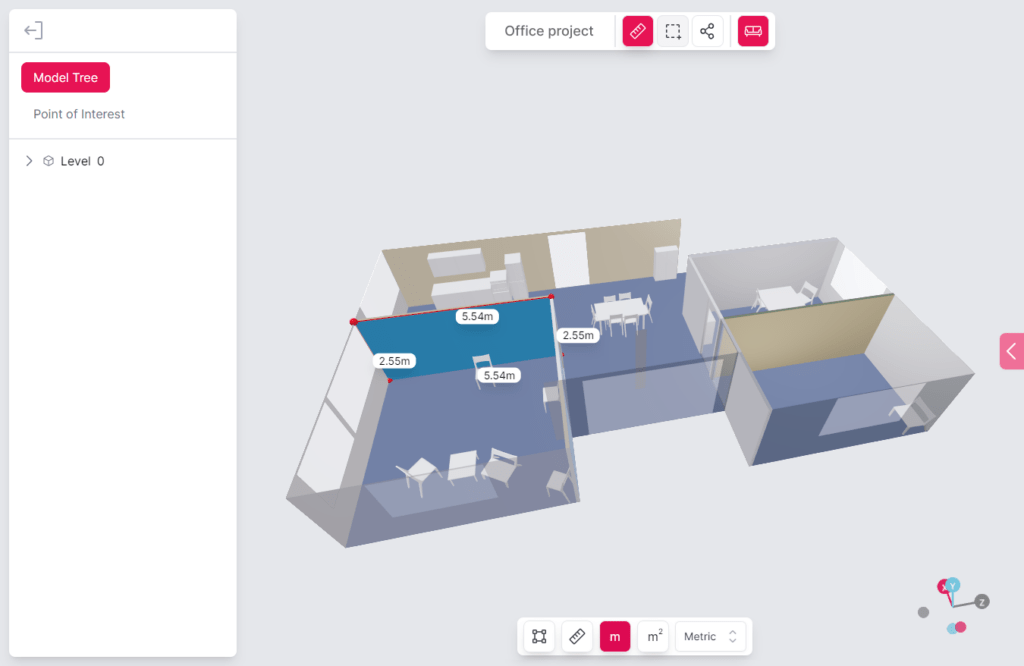
- Outside Dimensions of model elements – this functionality provides you with the outside measurements of selected room elements (e.g., walls, windows, etc.).
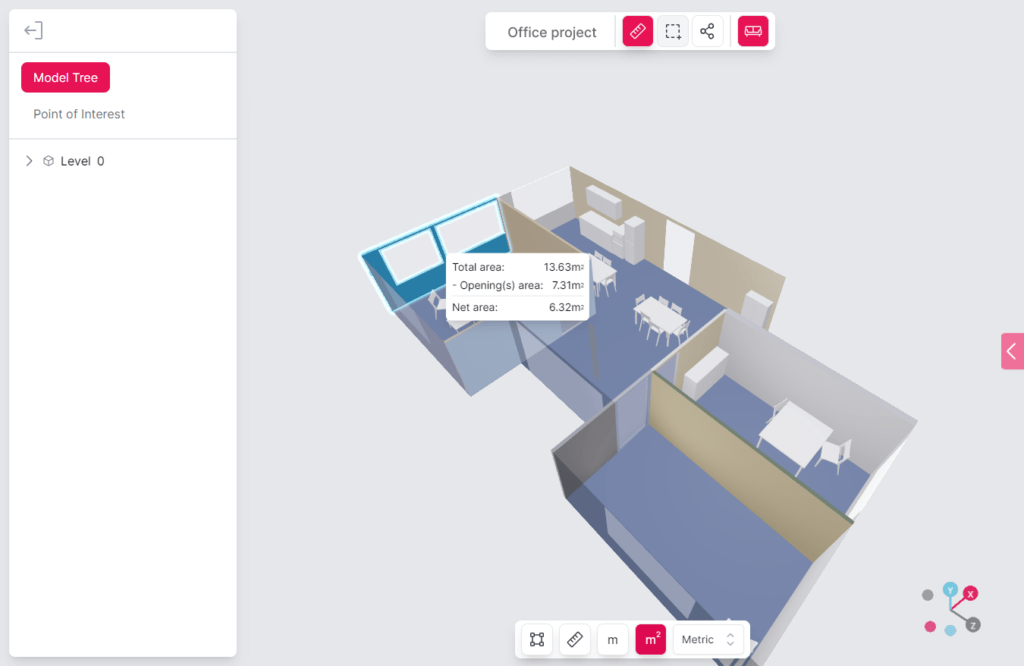
- Area of model elements — by activating the “Area” tool, users can select the room walls or objects and see the total area measurement. If the selected room includes openings like doors or windows, you can see the total area, opening area, and net area measurements.
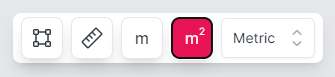
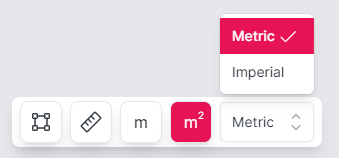
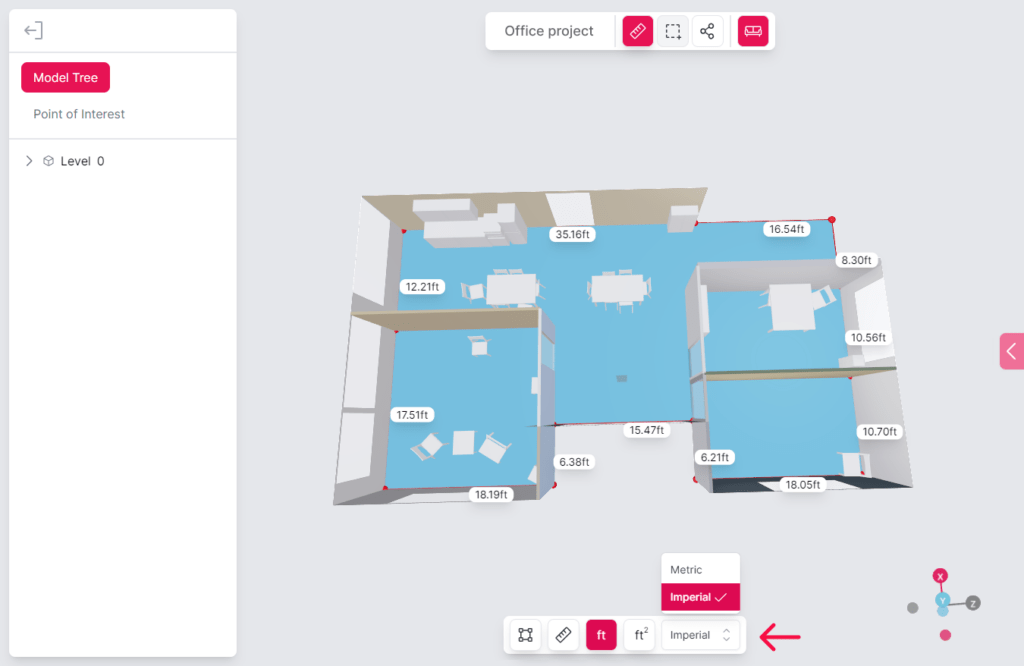
In addition to these four basic measurement functionalities, Metaroom Workspace allows you to obtain an approximate measurement in two units:
- Metrisches System
- Imperiales System
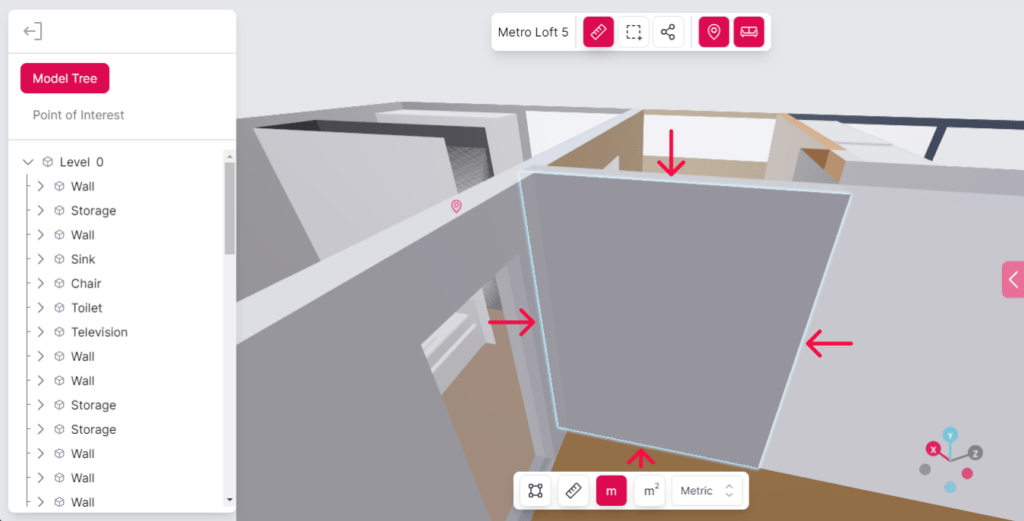
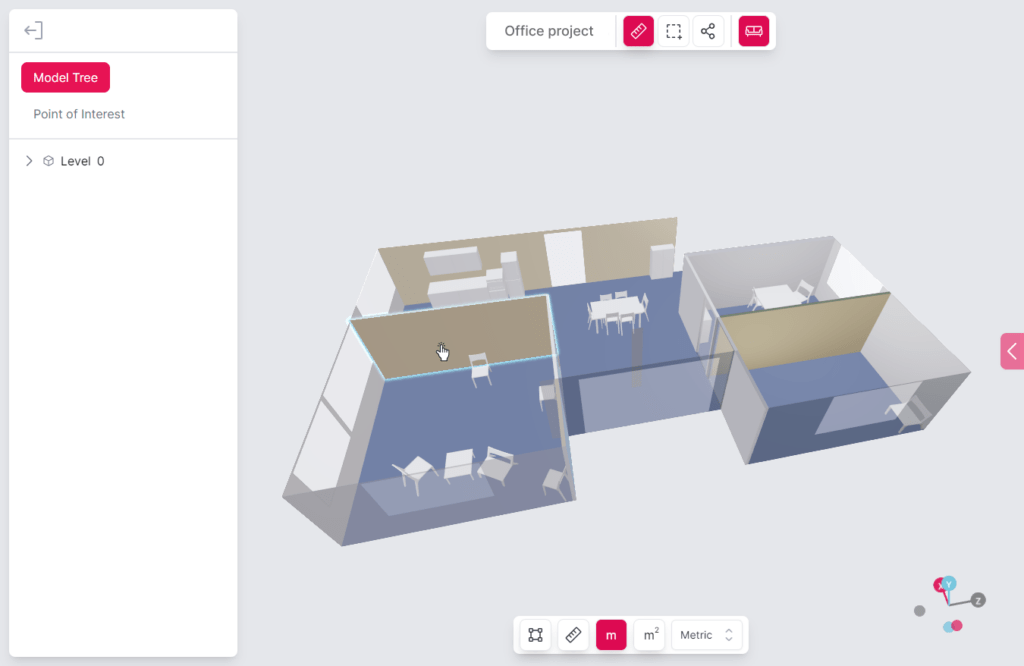
Pay attention to the highlighted outline around the selected room elements! The light blue line represents the precise boundaries of the chosen room’s element, and all measurements rely on it. If the highlighted outline does not correspond to the measurement you want to obtain, use the „Area Measurement“ or „Measuring tape“ functions to get your desired measurement. Press and hold the „Shift“ key to turn off snapping to the existing element boundary (active by default).
How do I measure a specific part of the room?
To measure specific areas of the room, use the “Area Measurement Tool”. Here are the steps that you need to follow to measure manually defined parts of your scanned room:
- Navigate to the Metaroom Workspace.
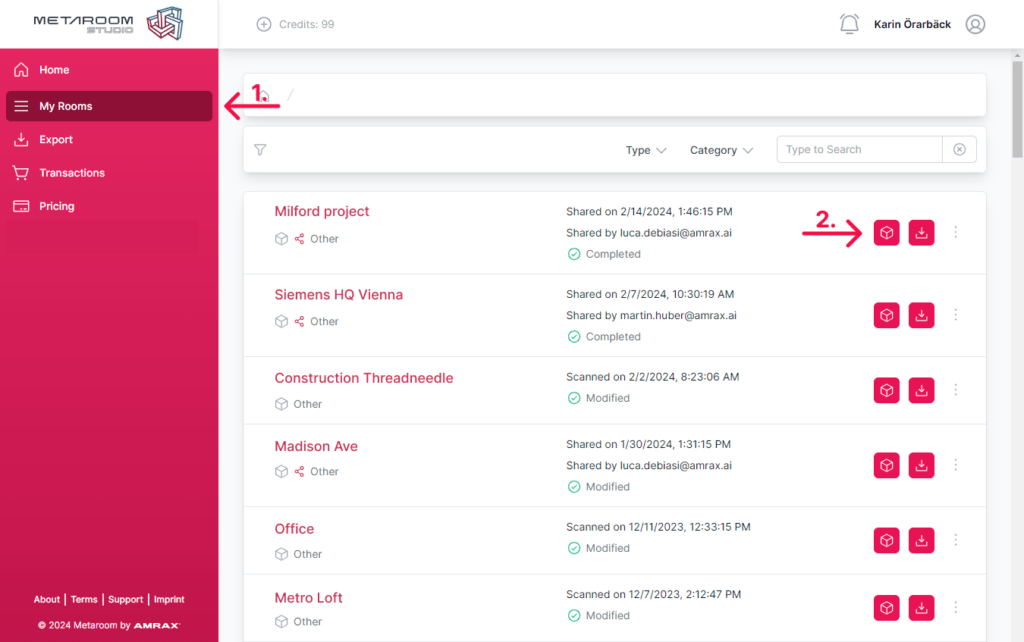
- Open the 3D model of the scanned space from the room list.
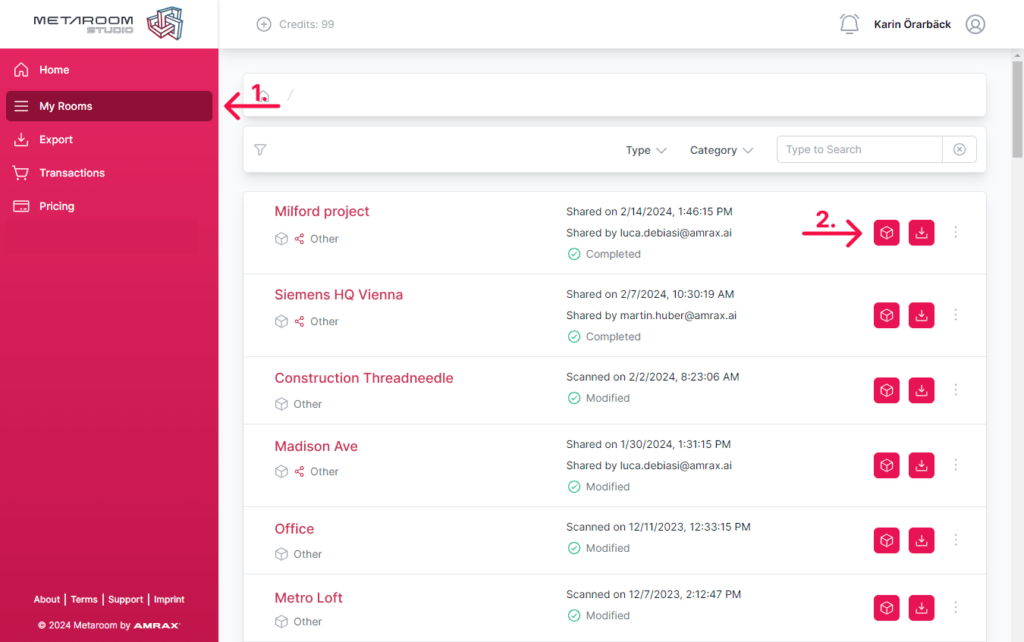
3. Klicke auf das Messsymbol am oberen Rand des Bildschirms.
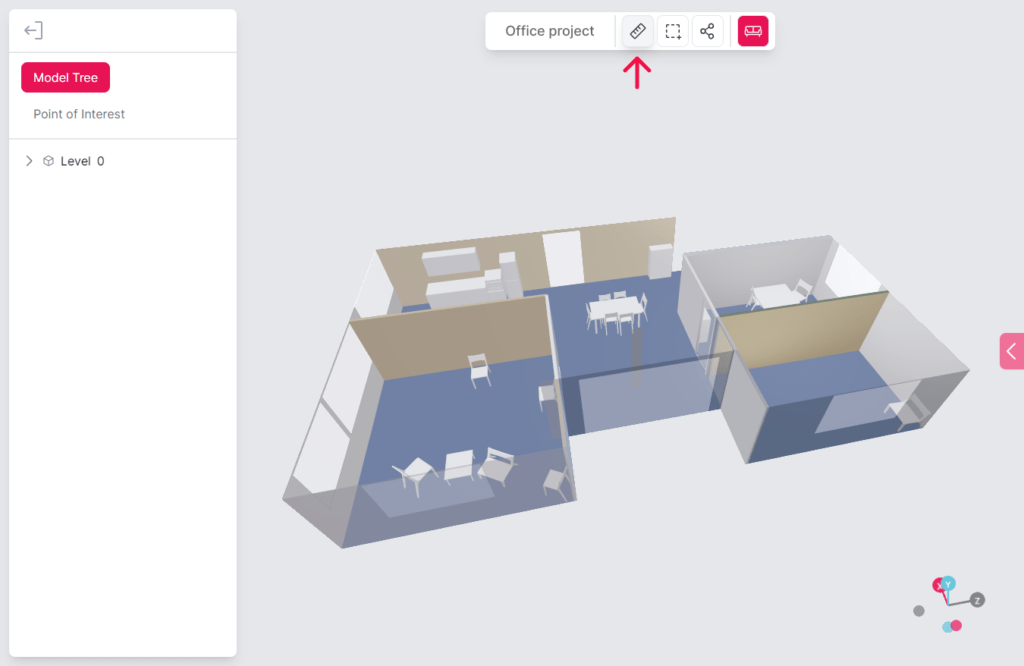
4. Choose the “Area Measurement Tool” from the measurement toolbox.
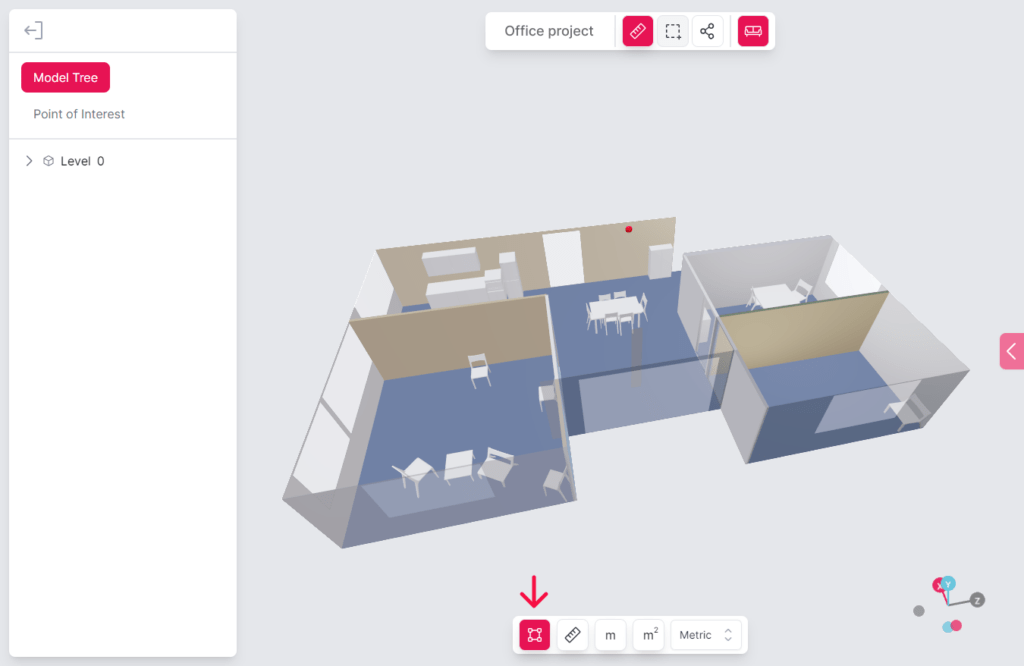
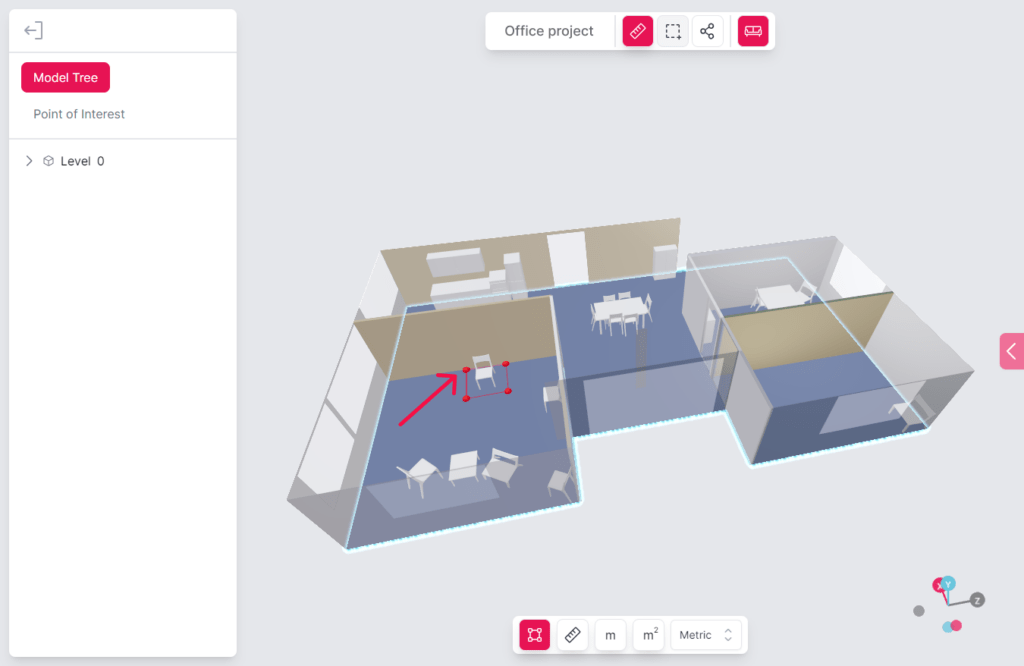
5. Klicke auf den gewünschten Bereich und fixiere die Punkte, während du die Maus bewegst.
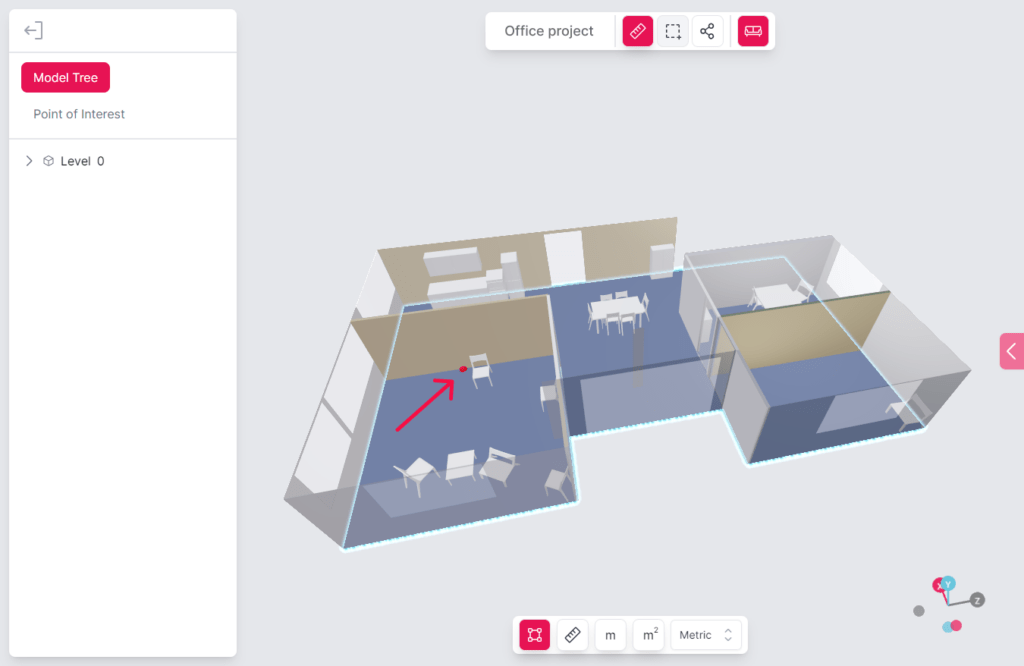
Profi-Tipp: Um das Einrastwerkzeug frei zu positionieren, halte die Umschalttaste gedrückt und klicke auf die gewünschte Stelle oder die Eckpunkte des Elements.
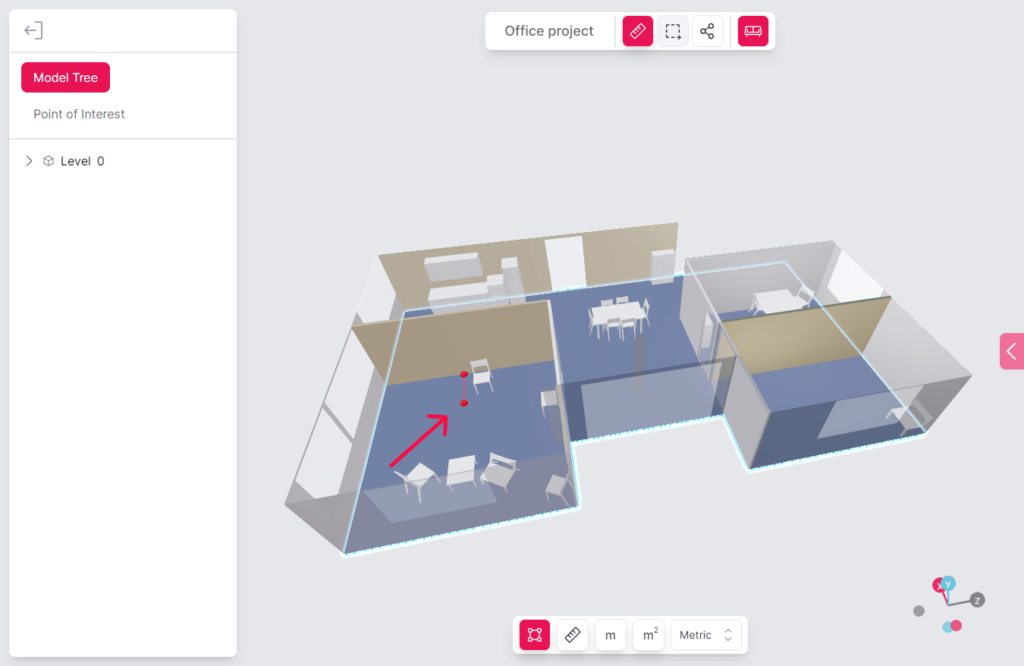
6. Schließe den Messbereich, indem du auf den ersten Punkt klickst. Mit anderen Worten: Du musst den ausgewählten Bereich schließen.
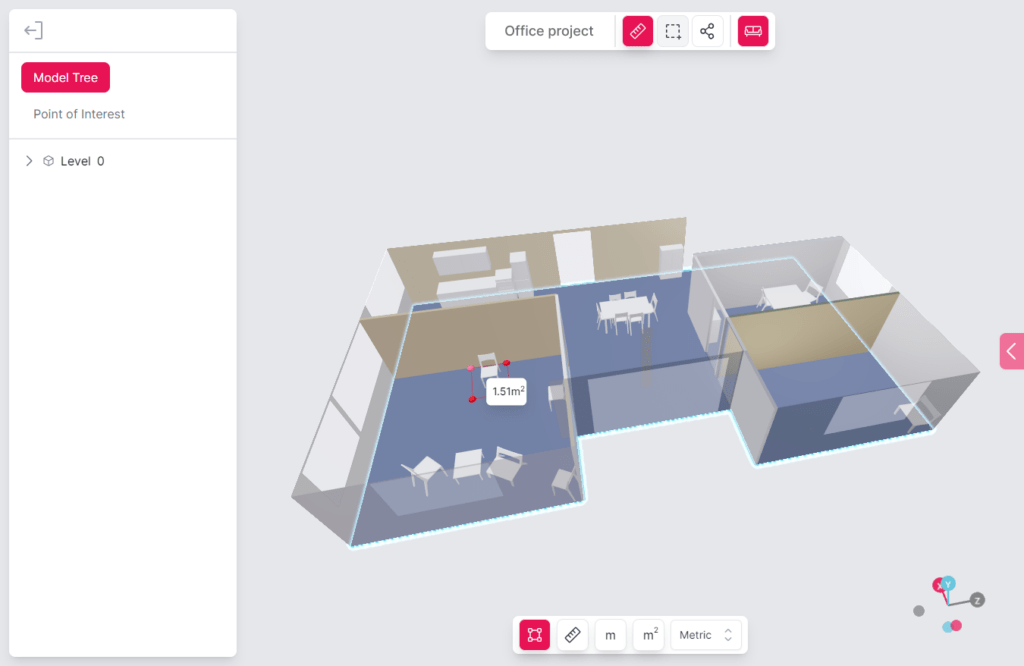
7. The total area measurement will be displayed for the selected area.
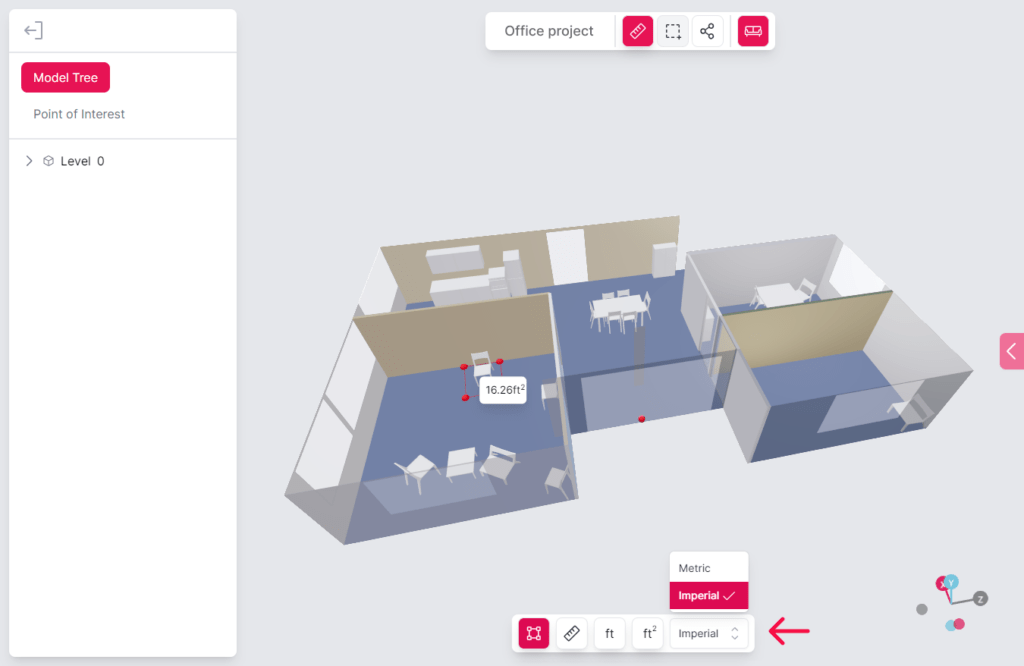
8. Wechsle bei Bedarf über das Dropdown-Menü in der Mess-Toolbox zwischen den Einheiten.
How do I measure length or distance in the room?
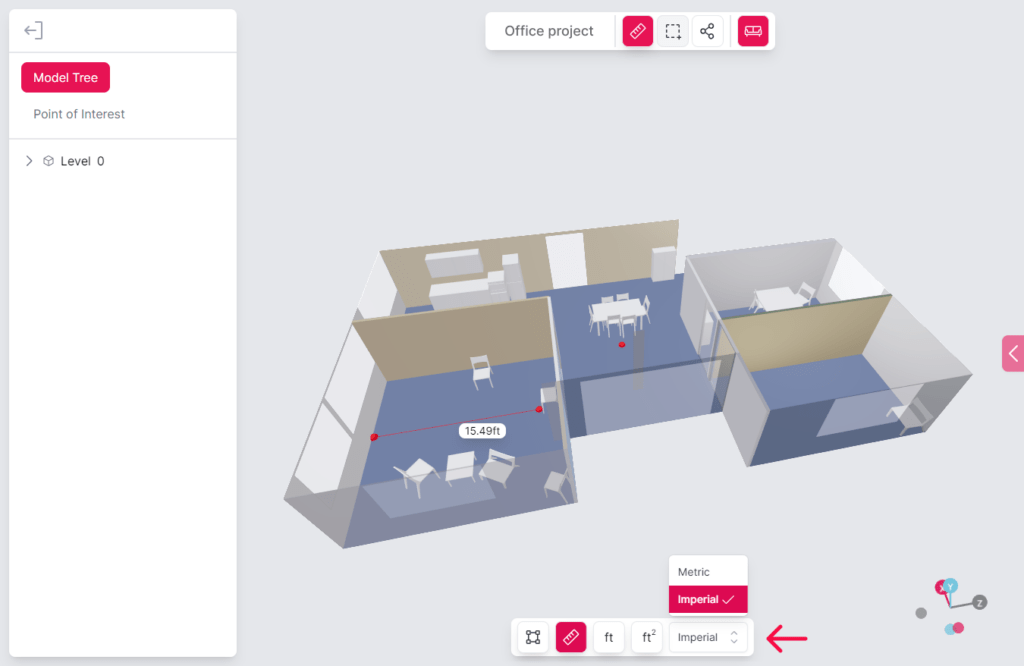
To measure a specific length in the room, use “Measuring Tape”. Here are the steps that you need to follow to measure a particular distance in your scanned room:
- Navigate to the Metaroom Workspace.
- Open the 3D model of the scanned space from the room list.
3. Klicke auf das Messsymbol am oberen Rand des Bildschirms.
4. Select “Measuring Tape” from the measurement toolbox.
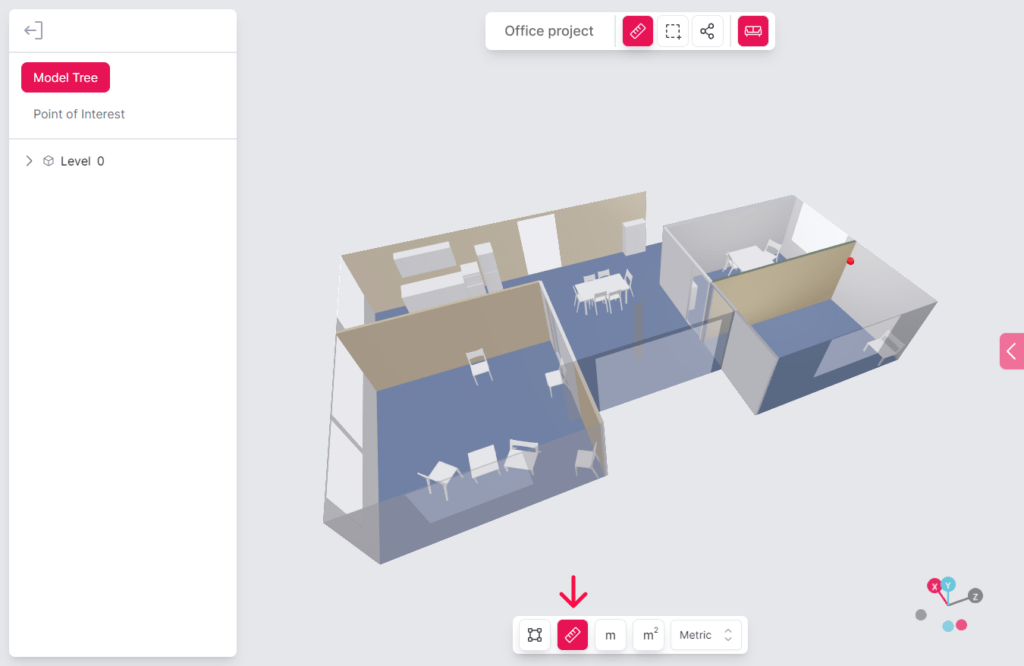
5. Zum Setzen des ersten Messpunktes, klicke auf den gewünschten Ausgangspunkt.
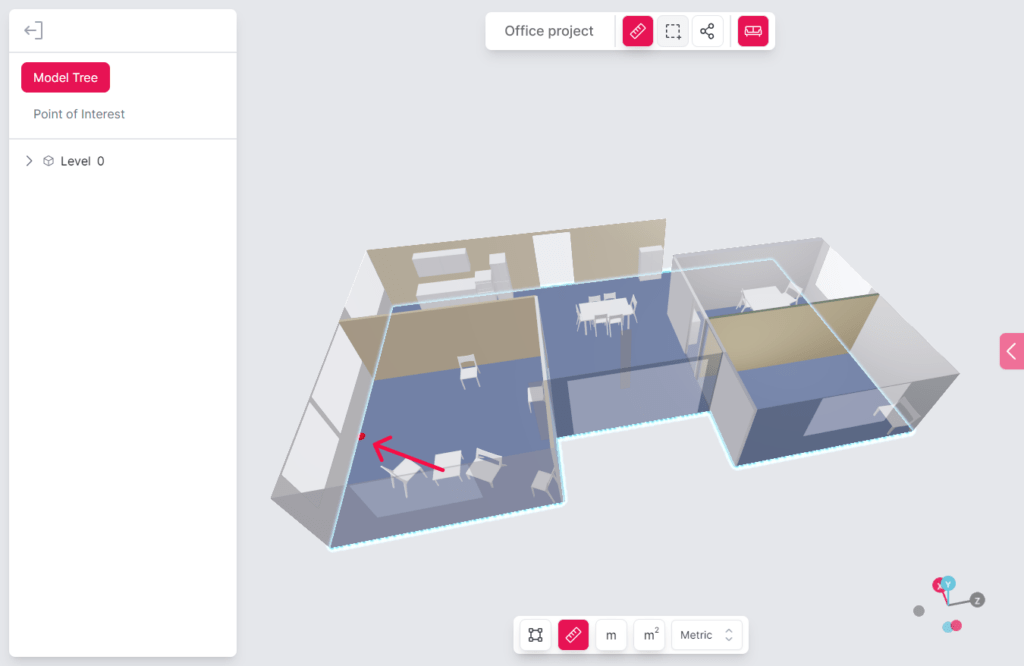
6. Bewege dich zum Endpunkt und klicke, um ihn zu setzen.
Profi-Tipp: Um das Einrastwerkzeug frei zu positionieren, halte die Umschalttaste gedrückt und klicke auf die gewünschte Stelle oder die Eckpunkte des Elements.
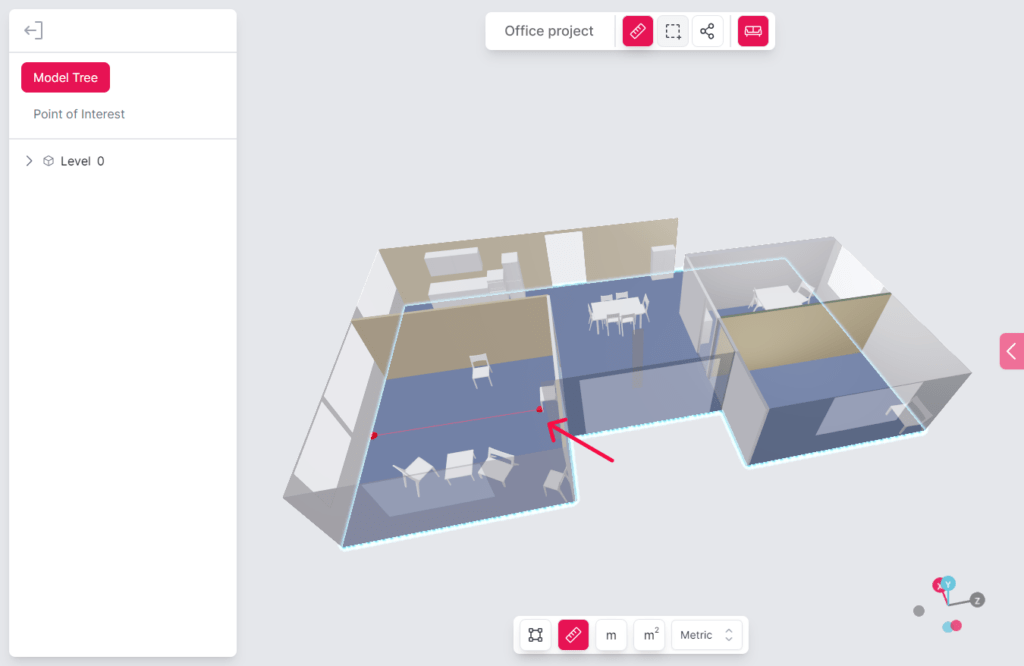
7. Die Länge der gewählten Distanz wird angezeigt.
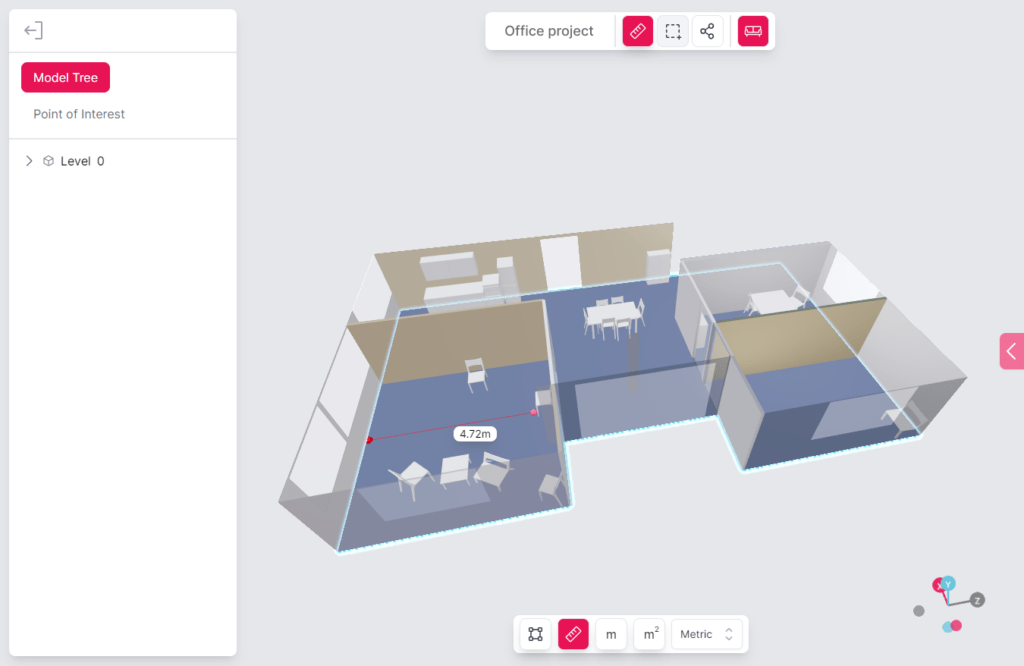
8. Wechsle bei Bedarf über das Dropdown-Menü in der Mess-Toolbox zwischen den Einheiten.
How do I measure the room’s elements along the perimeter?
To obtain the perimeter length of the selected room objects, use the „Outside Dimensions“ tool. Here are the steps that you need to follow to display measurements of the specific room element:
- Navigate to the Metaroom Workspace.
- Open the 3D model of the scanned space from the room list.
3. Klicke auf das Messsymbol am oberen Rand des Bildschirms.
4. Choose „Outside Dimensions“ from the measurement toolbox.
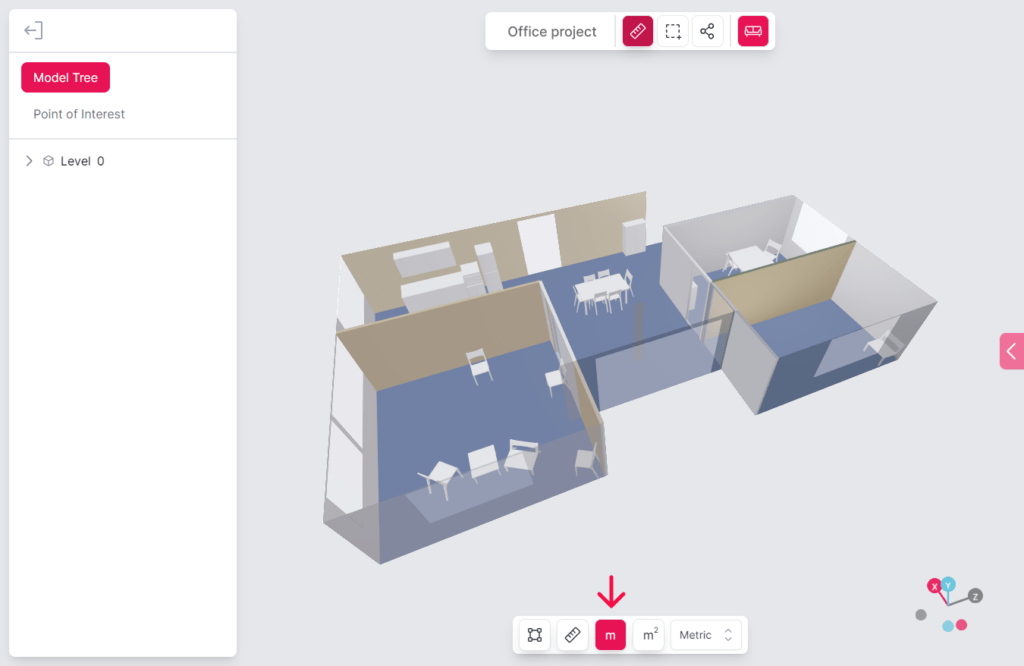
5. Klicke auf den Bereich, den du messen möchtst (z. B. eine Wand oder ein Fenster).
6. Die einzelnen Maße, aus denen sich der Umfang des ausgewählten Elements zusammensetzt, werden angezeigt.
7. Wechsle bei Bedarf über das Dropdown-Menü in der Mess-Toolbox zwischen den Einheiten.
How do I measure the total area of the room’s elements?
Use the ‚Area‚ tool to see the total area of the selected room’s object. Follow these steps to display total area measurements:
- Navigate to the Metaroom Workspace.
- Open the 3D model of the scanned space from the room list.
3. Klicke auf das Messsymbol am oberen Rand des Bildschirms.
4. Select “Area” from the measurement toolbox.
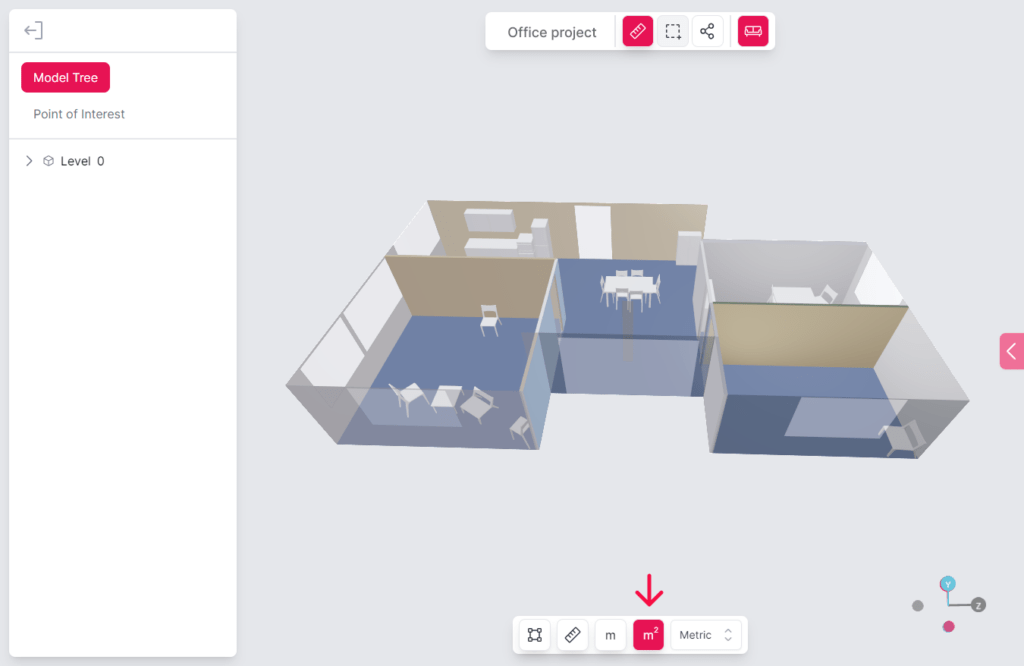
5. Klicke auf den Bereich, der dich interessiert (z. B. Wand oder Boden).
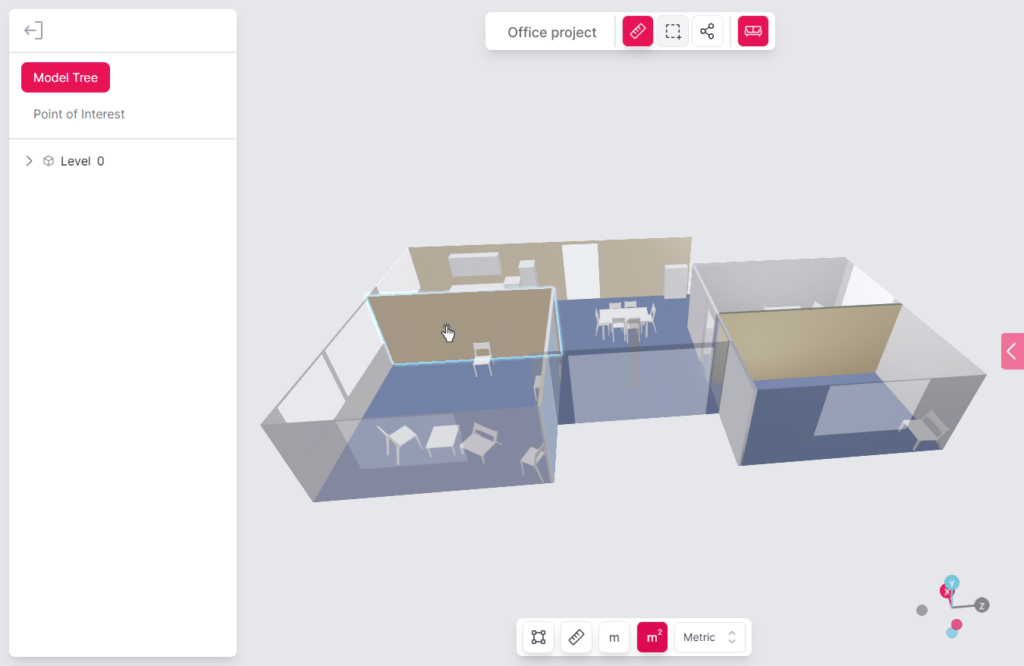
- Es wird die Gesamtfläche des ausgewählten Raumelements angezeigt. Wenn der ausgewählte Bereich Öffnungen aufweist (z. B. Fenster oder Türen), werden die Maße wie folgt angezeigt:
- Die „Gesamtfläche“ des ausgewählten Teils des Raums,
- die Fläche der „Öffnung(en)“,
- „Nettofläche“ = „Gesamtfläche“ – „Fläche der Öffnung(en)“.
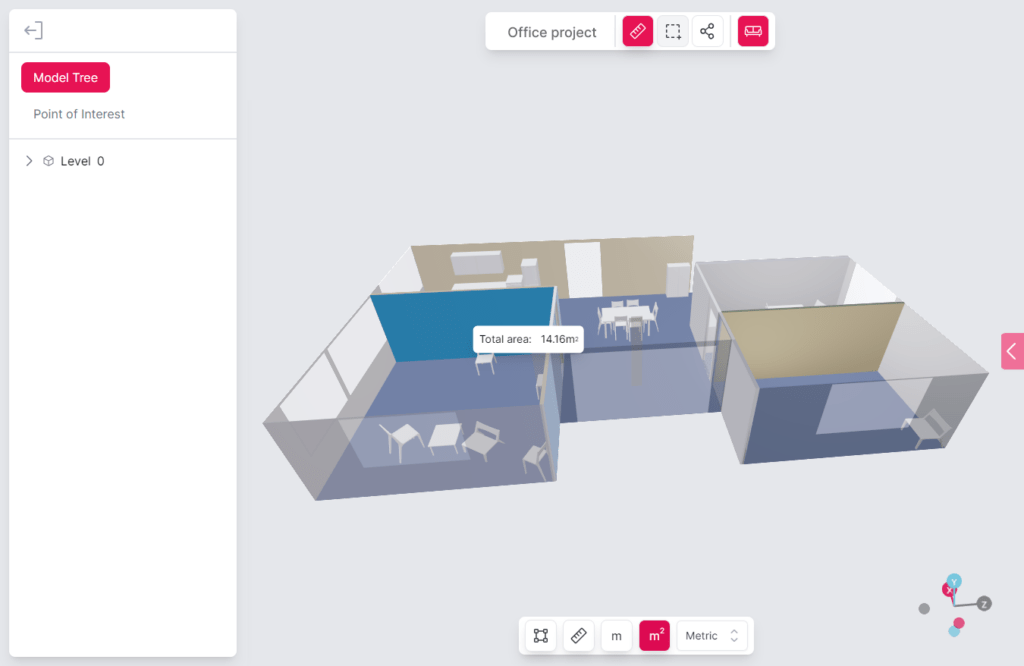
7. Wechsle bei Bedarf über das Dropdown-Menü in der Mess-Toolbox zwischen den Einheiten.